
Updated:
This describes how I make a virtual machine on my Fedora 26 desktop. The Fedora 26 machine is called the "host", and the virtual machine is called the "guest". The virtualization software used is QEMU/KVM from the Fedora release depository.
In the examples you will see my username haas and home directory /home/haas. When you follow the examples, substitute your own username and home directory. My host machine runs the XFCE spin of Fedora 26. The example guest machine runs the XFCE spin of Fedora 27. This is my personal preference. You should be able to install almost any Linux distribution in the guest machine. It is possible to install non-Linux systems in guest machines, but if you do that the interface to the host machine may be more complicated.
I. Make the simplest working virtual machine
- Install the virtualization software:
$ sudo dnf -y group install --with-optional virtualization
- File /etc/libvirt/qemu.conf specifies the user and group that virtual machines will run under. I edited this file to say
user = "haas"
group = "haas"
so that any virtual machine I start will run as me. Start the servers:$ sudo systemctl enable libvirtd.service $ sudo systemctl start libvirtd.service $ sudo systemctl enable virtlogd.service $ sudo systemctl start virtlogd.service
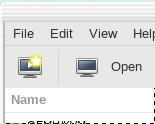
- Start the Virtual Machine Manager from Applications > System
- Click on the image of the sceen with the bright star in the upper left corner to start creating a new guest machine.
- Choose the type of source of the operating system for the new guest machine. In this example I use an ISO image in my home directory:
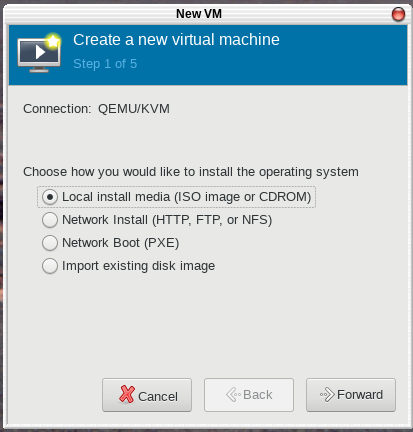 .
.
- Choose the desired ISO image.

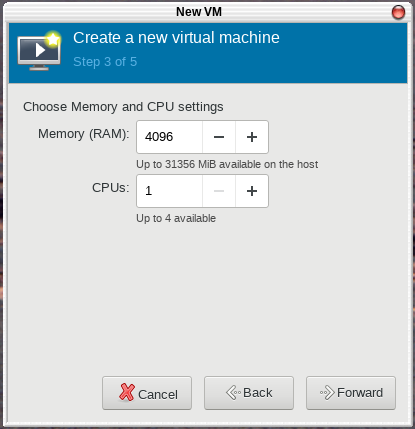
- Specify 4GB of RAM for the new guest machine.
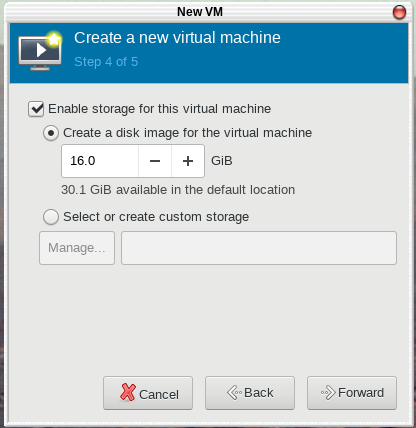
- Specify 16GB of disk space for the new guest machine.
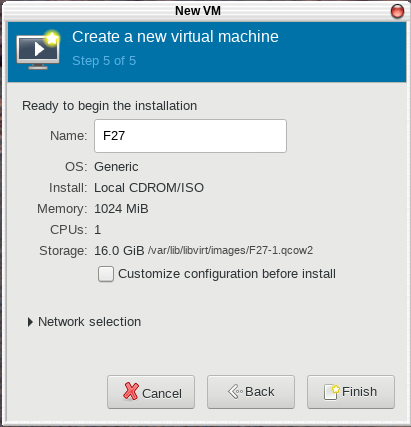
- Name your new guest machine and begin installation of its operating system.
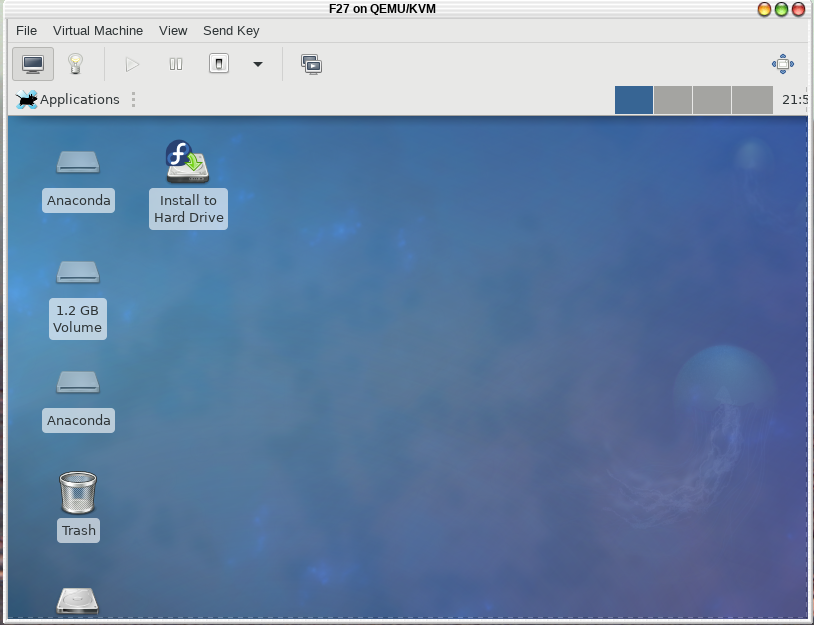
- Install the system in the guest machine in the normal way, in this case by double clicking "Install to Hard Drive".
- To support cut-and-paste between host and guest, the guest must run spice-vdagent. If it isn't installed in the guest by default, you can probably install it from the approriate Linux repository.
Storage for the guest is in /var/lib/libvirt on the host. The disk image for the guest we just created is in /var/lib/libvirt/images/F27.qcow2 .
II. Make a more capable virtual machine
In the example in I. above we got a virtual machine running, but it has practical limitations. The space available to the guest is limited by the space available in /var on the host, and there is no practical way to transfer files between guest and host. In the example below we will solve both of these problems.
- Create the directory that you will use for guest machine storage. You can put this directory almost anywhere. The location I use, /home/haas/virt is my personal preference, and it is consistent with guest machines that run as user/group haas/haas . My host runs SELinux in enforcing mode so I set the context of /home/haas/virt when I create it:
$ cd
$ mkdir virt
$ sudo semanage fcontext -a -t svirt_image_t "virt(/.*)?"
$ restorecon virt
$ ls -lZd virt
drwxrwxr-x. 2 haas haas unconfined_u:object_r:svirt_image_t:s0 4096 Dec 29 15:09 virt
I make two subdirectories of virt/:$ mkdir virt/pool virt/share
virt/pool is where guest machine images will be stored, and virt/share will be used for file exchange. Under virt/share I will make a subdirectory for each guest machine, just to keep track of what file goes with which machine. - Note the uid/gid that you are running as:
$ id
uid=1000(haas) gid=1000(haas)
The numeric uid/gid will become important later when we share files between guest and host. - If you haven't already, install and configure the virtualization software as in steps I.1. and I.2. above.
- We will repeat the guest machine creation above, using the same name for the guest. If you followed the instructions above, you can delete the guest machine, or give the new guest machine a different name.
- Start the Virtual Machine Manager from Applications > System
- Click on the image of the sceen with the bright star in the upper left corner to start creating a new guest machine.
- Choose the type of source of the operating system for the new guest machine. In this example I use an ISO image in my home directory:.
- Choose the desired ISO image.
- Specify 4GB of RAM for the new guest machine:
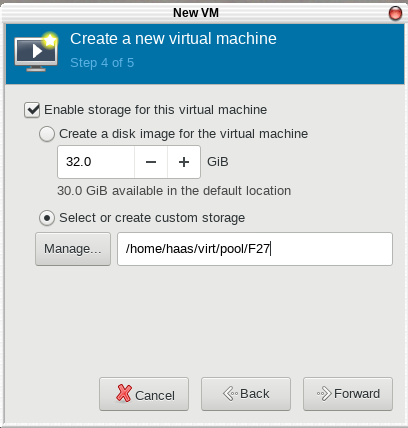
- Specify 32GB of disk for the new guest machine:
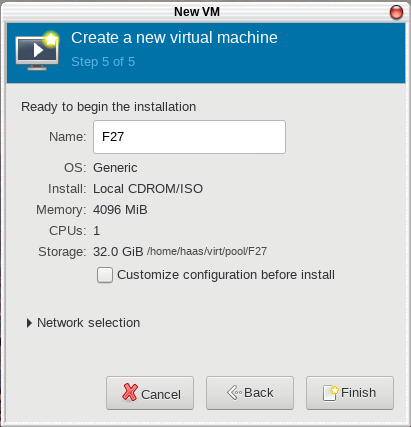
- Name your new guest machine and begin installation of its operating system.
- Install the system in the guest machine in the normal way, in this case by double clicking "Install to Hard Drive".
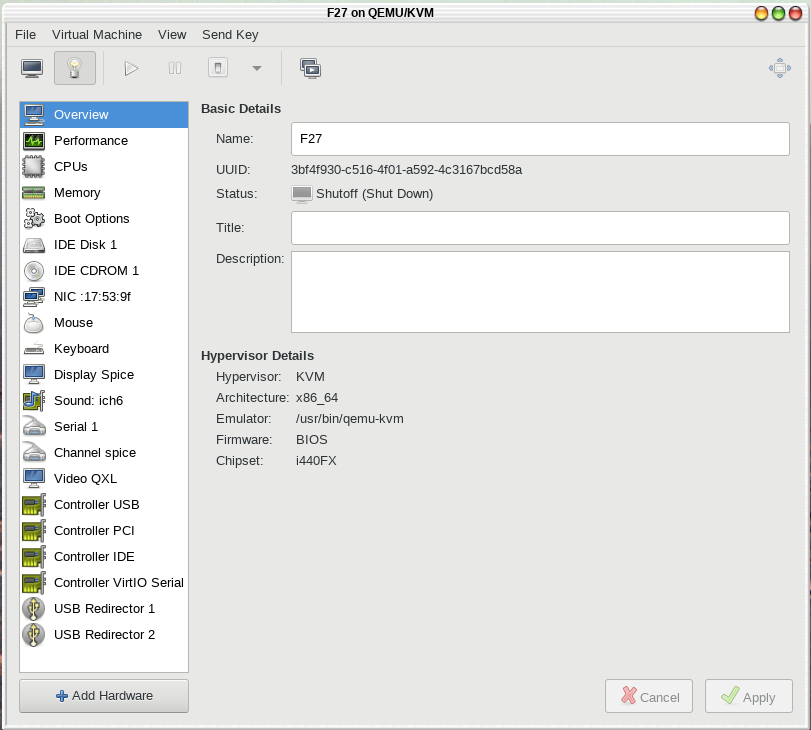
- When installation completes, stop the guest machine. With the guest machine stopped, open its Details menu by either clicking on the light bulb image or clicking View and selecting Details. Click the button in the lower left corner.
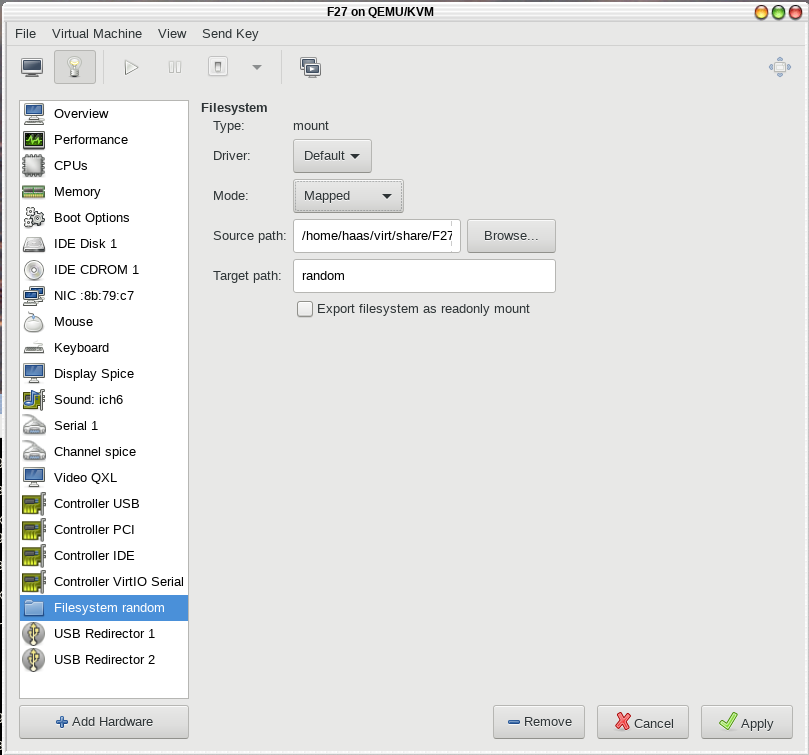
- Select Filesystem from the menu on the left. Select Mode: Mapped . For Source path: enter the host directory you will use to exchange files with this guest machine. As you see, I created a subdirectory with the same name as the guest machine, just to keep my files organized. For Target path: enter a random name of your choice. This will become the filesystem name used in the mount command that gives the guest machine access to this host directory.
- To start the new guest machine click on the screen image in the upper left corner so you can see the guest machine console. Then click on the arrow to boot the machine. When the guest machine is running, log in as the privileged user. IMPORTANT: The user on the guest machine must have the same uid/gid as the owner of the virtual machine that you noted in step 2 above.
- The image of the guest machine is in /home/haas/virt/pool/F27 on the host machine:
$ ls -l --block-size=G virt/pool
total 5G
-rw-------. 1 haas haas 33G Dec 29 16:46 F27
- Log in to the guest machine and create a directory that you will use to exchange files with the host machine. I follow my usual practice in the guest machine, with username haas and share directory /home/haas/virt. As usual, substitute your own preference. Only the uid/gid is important.
$ id
uid=1000(haas) gid=1000(haas)
$ mkdir virt
- Add a line to /etc/fstab in the guest machine to mount the guest's /home/haas/virt to communicate with the host:
$ sudo su -
# cat >> /etc/fstab
random /home/haas/virt 9p trans=virtio,version=9p2000.L,rw,noauto 0 0
It would be convenient if the mount could be done automatically when the guest machine booted, but that doesn't seem to work, so you must manually give the command:$ sudo mount random
Files in /home/haas/virt/share/F27 on the host will be accessible in /home/haas/virt on the guest, and vice versa.